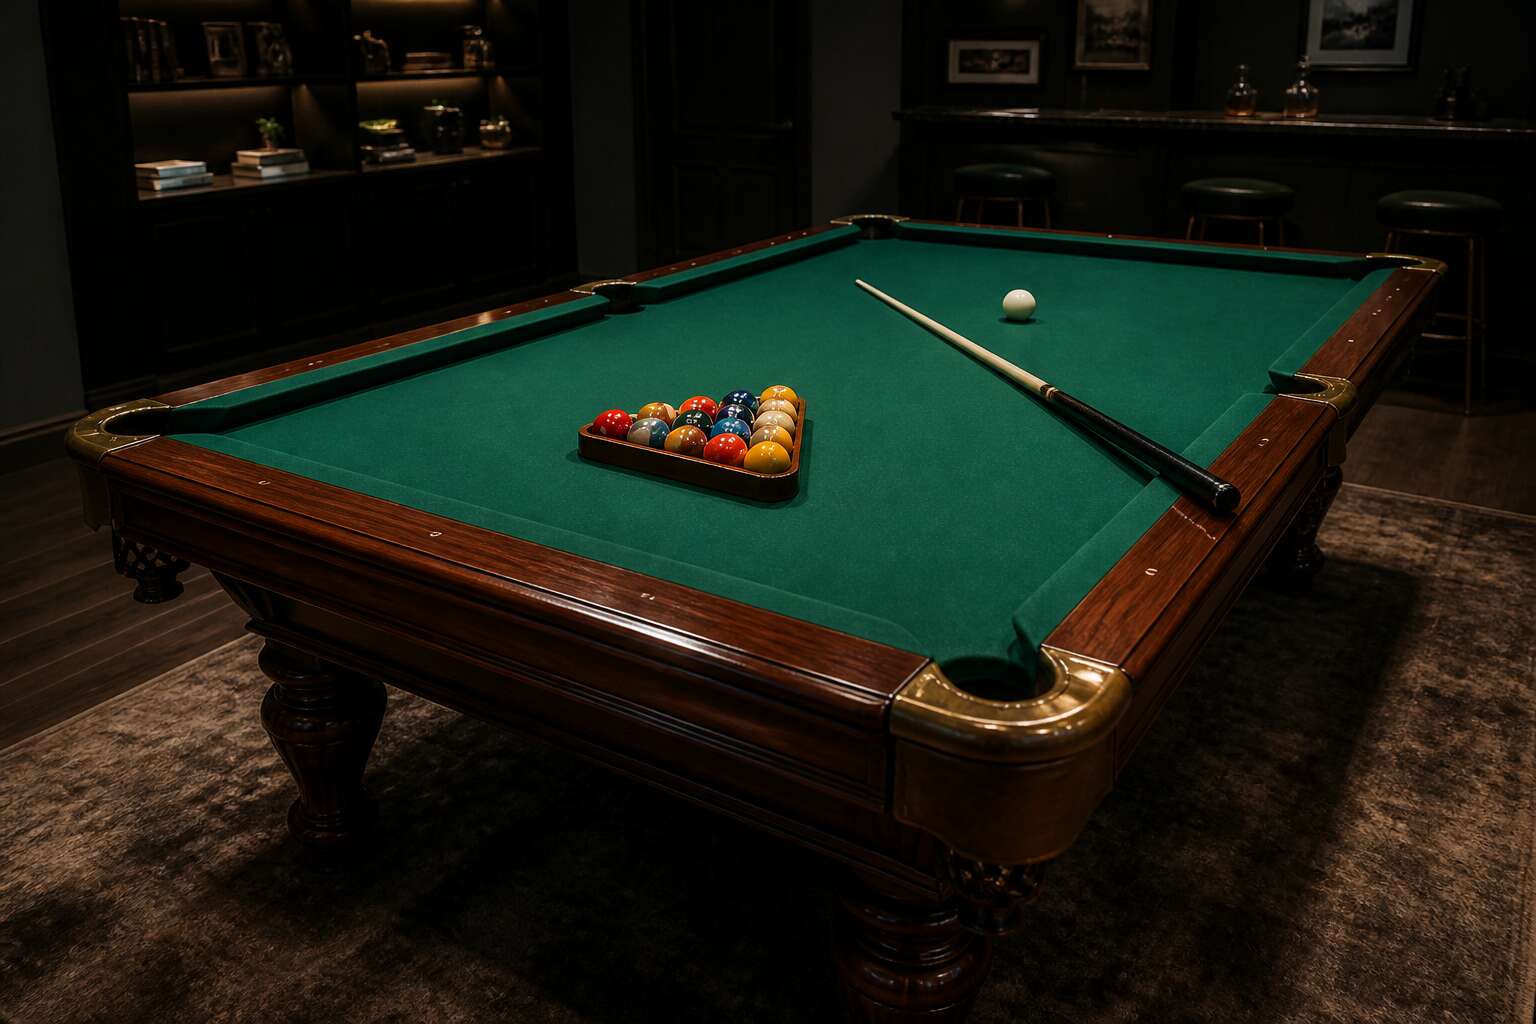
Essential Tools and Software for 3D Billiard Table Creation
Choosing the Right Modeling Software: Blender, 3ds Max, or Maya
Creating a pool table 3d model often begins with choosing software, and the options vary more than the price of a decent cue stick. Blender is free, open source, and occasionally infuriating, but it handles organic shapes well. 3ds Max offers precision modeling that keeps CAD types happy, though the licensing feels like a subscription to a gym you never visit. Maya excels at animation and rigging, which matters if your billiard balls will dance.
Here is a rough breakdown for your specific needs:
– Blender: best for budget starting points
– 3ds Max: best for hard surface accuracy
– Maya: best for deformation and movement
Your current workflow dictates the winner, not marketing brochures.
Understanding CAD vs. Polygonal Modeling Approaches
A pool table 3d model lives or dies by its geometry. When creating one, you face two distinct approaches: CAD and polygonal modeling. CAD tools like SolidWorks or Fusion 360 give exact dimensions, perfect for the frame and rails. Polygonal modeling, through Blender or Maya, offers the freedom to shape curves and cushions naturally. Both have their place, but knowing when to switch matters.
Essential tools go beyond the core software. You need UV mapping for realistic felt, texture painting for wood grain, and lighting tests to sell the depth. Consider these:
- Substance Painter for texture detail
- Marmoset Toolbag for real-time rendering
- ZBrush for organic details like leather or metal studs
Each step builds a believable pool table 3d model, from the first edge to the final render. Without the right toolkit, even a perfect silhouette will feel flat.
Plugins and Add-ons for Realistic Wood Textures
Texture determines whether a pool table 3d model convinces the eye. I depend on plugins that replicate timber’s natural irregularities. The Poliigon texture add-on for Blender delivers PBR maps that catch light the way aged mahogany should. For finer control, the Physical Starlight and Atmosphere plugin tests how felt behaves under different bulbs.
- Substance 3D Sampler for scanning real wood swatches
- JSPlacement for scattering dust and chalk particles
- Smart Material libraries from Quixel Megascans
These tools transform a sterile mesh into a warm object. The final render shows cushions with wear, timber with history, and a pool table 3d model that feels lived in.
Using Measurement References from Official Tournament Tables
The World Pool-Billiard Association mandates a playing surface of 2540 by 1270 millimeters. I treat those figures as fixed rules when building geometry. A pool table 3d model that ignores official measurements exposes itself to a scrutinising eye. The cushion nose height, the pocket mouth width, the slate bed thickness, each element demands reference.
I rely on a compact set of instruments to capture these specifications faithfully.
– Digital calipers to verify physical samples against regulation numbers
– Tournament specification sheets from governing bodies to define boundary constraints
– Photogrammetry scans of competition tables to confirm proportions
These tools anchor the geometry in reality. The finished pool table 3d model carries a weight that invention cannot replicate. Players feel the difference even in a rendering.
Step-by-Step Approach to Modeling the Table Frame and Legs
Blocking Out the Base Structure with Primitive Shapes
Blocking out the base structure for a pool table 3d model starts with primitive shapes. A box forms the frame, and four cylinders become the legs. I find this rough layout reveals proportion problems before any fine detailing. For a tournament table, the playing surface ratio is 2:1, so the frame should respect that geometry.
- Create a rectangular box sized to the outer frame dimensions.
- Position a cylinder at each corner, aligning the centers with the frame edge.
- Set the cylinder height to the typical leg measurement, around 31 inches from floor to rail.
Once these primitives sit correctly, the model has a dependable structure. Adjustments here save hours later!
Adding Intricate Details to the Wooden Apron and Rails
A pool table 3d model succeeds or fails on its frame, a reality I have learned across many projects. Once the primitive base is set, I add definition. I taper each leg cylinder and place a chamfered base plate beneath it. The frame box receives a bevel on its lower edge, which creates distinct shadows.
For the wooden apron, I model the skirting as a separate mesh. Here is my sequence:
- Extrude the apron profile from the frame face.
- Add a recessed panel for visual depth.
- Cut pocket openings with a boolean modifier, then smooth each edge.
The rails demand careful attention. I shape the cushion profile and blend it into the rail cap. Each seam must align because every pool table 3d model shows imperfections under direct lighting.
Modeling the Legs and Leveling Adjusters
Most modelers expect the legs to be dull. The opposite is true. The legs carry the visual weight of a pool table 3d model, so I treat them with care. I start with a cylinder, tapering toward the floor. The taper stays subtle. A chamfered base plate anchors each leg.
Leveling adjusters are easy to ignore, yet they matter. A real table uses threaded feet to handle uneven floors. In a pool table 3d model, those threads add realism. I model each adjuster as a short cylinder with a knurled collar. The thread is a simple spiral. Placement follows a strict order:
- Position the four legs at the exact frame corners.
- Align the adjusters directly beneath the leg centers.
- Rotate the collars so the seams face inward.
- Check leg heights against the frame reference plane.
This sequence prevents wobble in the final render. A level table demands the same respect as its physical counterpart.
Creating the Pocket Openings and Corner Castles
Every pool table 3d model begins to feel real once the frame takes shape. The frame is a lattice of support beams, cross braces, and the outer skirt that hides the slate. I build it as a separate assembly, then attach it to the legs. This lets me adjust the height without rebuilding the rails.
The pocket openings demand precision. A wrong curve throws off the entire playfield. I cut each opening with a boolean operation, then clean the mesh manually. The corner castles are where most artists stumble. These castings protect the cushion ends and carry the pocket plates. I model them as individual components and rotate them into place.
– Trace the pocket throat curve onto the rail face.
– Cut the opening using the bezier curve as a guide.
– Insert the castle blank and align it to the cushion nose.
– Weld the vertices to keep the mesh watertight.
The result is a pool table 3d model that reads as machined, not sculpted.
Ensuring Perfect Symmetry with Mirror Modifiers
Building the frame starts with a single leg. I model one complete leg assembly, including the leveling adjuster, then duplicate it with a mirror modifier. This guarantees perfect symmetry without tedious manual alignment. The frame itself follows a similar logic. I construct one quadrant of the support lattice, apply the mirror modifier across the x and y axes, and let the software handle the rest.
For the frame, I focus on structural clarity. The cross braces must align with the slate joints. The skirt needs a slight bevel to reflect light. Each step is deliberate:
- Model the leg profile from the reference measurements.
- Position the leveling adjuster at the base.
- Apply the mirror modifier to duplicate the leg.
- Build the frame quadrant and mirror it twice.
This yields a pool table 3d model that holds its geometry true. No extra cleanup, no warped symmetry. Just clean, rational construction!
Designing the Playing Surface and Cushions with Precision
Mapping the Playing Field Dimensions and Cloth Texture
In tournament play, the playing surface is a plane of exacting tolerance. A variation of just a few thousandths of an inch can redirect a ball’s trajectory. When building a pool table 3d model, I treat the slate bed as a single, unbroken surface, then lay the cloth texture over it as a separate layer. The nap, the weave direction, and the friction coefficient become tangible properties rather than decorative noise.
The cushions demand equal precision. The rubber profile dictates rebound speed and angle. I map the cushion nose height to the official specification, which sits just above the geometric center of the ball. For accurate rendering:
– Set the cushion angle to 90 degrees at the nose.
– Model the K66 profile from your reference table.
– Align the cushion face to the playing field centerline.
– Run the cloth grain parallel to the long axis.
The interaction between cloth and cushion gives the game its character. A pool table 3d model only convinces the eye when geometry and texture work in concert. The subtle shadow where the rail meets the felt, the light catching the fibers. That is where realism lives.
Creating the Slate Bed and Pocket Liners
The slate bed deserves more than a flat rectangle. In my pool table 3d model, I extrude the slate from a single block, then chamfer the underside to mimic the machined edges of real tournament slabs. The seam lines, where three pieces of slate meet under the cloth, are subtle but they influence how light falls across the surface. I add them as a faint mesh detail, not a texture stamp. There is a quiet satisfaction in getting this right!
Pocket liners are another quiet discipline. The liner curves from the cushion nose down into the throat of the pocket. Its radius controls how a ball rattles or drops. For the model, I extrude the liner profile along the pocket edge:
1. Measure the throat width at the opening.
2. Set the liner depth to the drop angle of the table.
3. Match the liner material to the rubber stiffness of the cushion.
A pool table 3d model earns trust in these hidden places. If the liner flares too wide or the slate lacks its subtle bevel, the eye catches the falsehood even when the mind cannot name it.
Modeling the Rubber Cushions for Accurate Ball Bounce
A rubber cushion defines a table’s playability! The playing surface of a pool table 3d model needs precision to the thousandth of a millimetre. The cloth tension vector, nap direction, and cushion nose height shape the ball’s trajectory.
When I model the rubber cushions, I rely on the K55 profile, the tournament standard. The cushion’s apex angle determines how kinetic energy transfers to a striking ball. The rebound behaviour changes if the rubber durometer shifts by even five points.
I build the cushion as a continuous extrusion along the rail, then adjust the face angle using the table’s specifications. This sets the bounce characteristics directly into the geometry. Consider the variables that affect ball travel:
- The cushion tip height relative to the cloth surface
- The angle of the nose at the contact point
- The backing material’s compression under load
A pool table 3d model that ignores these details is a picture, not a playable surface. Each variable alters the trajectory.
Applying UV Maps for the Felt Material
The playing surface is the geometric reference of the entire pool table 3d model. I treat the surface as a continuous sheet of green, placing seams away from the cushion’s kick points. A UV map for the felt material requires careful seam loops, isolating the bed from the cushion faces so the texture grain aligns with the longitudinal axes.
- The cloth texture scale in millimeters per pixel.
- The direction of the nap vector across the cushions.
- The stitching detail on the pocket liners.
In South Africa, the dry climate affects static charge, but the geometry of the surface remains authoritative. The UV mapped felt conveys a volumetric thickness on the rubber substrate. Using a tri-planar projection for the railing, while a standard UV map for the playing surface ensures zero stretching when the ball rolls.
Using Displacement Maps for Realistic Fabric Wear
Chalk dust embeds itself in the weave long before a player feels the drag. Displacement maps capture that slow decay. Where the cue ball travels most, the felt subsides by a fraction of a millimetre, and the pool table 3d model turns those worn paths into actual geometry rather than a painted illusion. Light shifts across the compressed nap, and the quiet honesty of the playing surface becomes part of the scene.
The cushion noses absorb thousands of impacts. A displacement map here softens the visual effect of repeat collisions. The rubber beneath keeps its precise rebound geometry, but the fabric over it shows age with truth. I find this wear detail matters when building a pool table 3d model for South African rooms, where dry winters tighten the cloth and a single session can leave its mark. That is where the realism lives!
- the worn track between foot spot and head rail
- the compressed nap where balls strike the cushion
- the gentle pilling near pocket mouths
Texturing, Lighting, and Rendering the Final 3D Scene
Creating Realistic Wood Grain and Varnish Shaders
Every polished rail hides a thousand microscopic ridges. A single coat of polymerized varnish reflects about 90 percent of light, but rendering that gloss inside a pool table 3d model requires a layered shader. I generate wood grain using a fractal noise texture, then apply a clearcoat with 0.02 millimeter thickness.
Lighting works best with two sources: a warm pendant bulb overhead and a cool neutral fill near the slate. For the final render, I enable ray tracing with 8 samples per pixel and activate sub surface scattering on the varnish nodes.
- Align the noise texture to the grain’s growth direction
- Adjust the clearcoat roughness to 0.15
- Use a linear color space for the lacquer highlights
These small decisions transform a sterile digital object into something that feels warm and tactile on screen.
Setting Up Studio Lighting for Product Visualization
Studio lighting for a pool table 3d model is a discipline of controlled shadows. I start with a key light positioned at a 45 degree angle, which carves out the pocket openings and gives the cushion profiles definition. A rim light at the rear separates the entire table from the background, preventing the silhouette from merging into darkness. For product visualization, the slate bed demands soft illumination to avoid harsh reflections on the felt.
The cloth texture requires a specific light source. A spot light with a large radius, placed directly overhead, mimics the standard lighting of a tournament hall. This pool table 3d model benefits from a bounce card on the floor to fill the shadows beneath the apron. I adjust the intensity to a ratio of 3:1, which keeps the details punchy without losing the subtlety of the wood finish.
– Use a flag to block stray light from the camera lens.
– Set the white balance to 4000 Kelvin for a neutral base.
– Turn on contact shadows for the leveling adjusters.
Rendering brings a quiet tension to the process. I use a progressive renderer with a sample limit of 64 to allow for noise reduction. The clearcoat on the varnish needs a specular threshold of 0.8 to catch the light correctly. I enable adaptive sampling on the pockets and the corner castles, areas with high geometric detail. The final output uses a logarithmic exposure curve, which preserves the highlight details on the polished wooden rails. This approach to a pool table 3d model prioritizes a clean, truthful representation of materials without dramatic flair.
Adding Environment Reflections and Shadows
A pool table 3d model gains authority when the surrounding room starts to live in its polished rails. I add a low-contrast environment reflection map, not a mirrored surface, to maintain the varnish’s depth. For shadows, I keep the ambient occlusion pass separate and blend it at 12 percent to avoid crushing the cushion profiles.
Here are the reflection and shadow checks I run:
- Check the felt for any unwanted specular streaks.
- Verify that the leg shadows fall onto the floor plane with real direction.
- Ensure the pool table 3d model casts a soft contact shadow on the cloth.
The final render uses a physical sky dome with a subtle warm tint. This creates believable reflections on the metal corner castings while the darker shadow areas retain their tone.
Rendering with Cycles or V-Ray for High-Fidelity Output
The final texturing pass ties every material together. I layer a subtle sheen over the cloth while the wood receives a clearcoat that catches light without washing out the grain. Each material demands restraint at this stage, so I rely on physically based values rather than eyeballing the result.
For lighting, I switch to a sun-driven setup with a soft fill from the opposite side. Cycles and V-Ray both handle this well when I use their adaptive sampling modes. I render the main pass at 4K with a denoiser enabled to keep the pool table 3d model crisp.
- Set the render engine to GPU acceleration for faster iteration.
- Use a linear color space for consistent output.
- Check the edge wear against the light direction.
The final frame holds the rail reflections and cloth texture without visible noise. That balance is the real measure of a clean render.
Post-Processing for Architectural Visualization
Architectural visualization rarely ends at the render pass. The pool table 3d model needs a compositing stage where separate passes merge into one cohesive frame. I import the beauty pass, the z-depth pass, and the ambient occlusion pass into the compositor. This gives me control over atmospheric depth without rerendering.
Post-processing is where the scene gains its final mood. I adjust the temperature slightly warmer to complement the wood tones. A subtle vignette draws the eye to the playing surface. The cloth texture stays readable while the shadows hold their weight.
- Combine the denoised beauty pass with a z-depth blur for natural focus falloff.
- Use a curves node to lift the black point, keeping the shadow detail intact.
The result feels present and solid. A pool table 3d model only convinces when the post work respects the lighting data gathered in the render. Restraint matters.
Optimizing the Model for Real-Time Engines (Unity/Unreal)
Offline rendering tolerates indulgence. A real-time engine does not. Moving the pool table 3d model from Cycles into Unity or Unreal forces every decision through a budget. Subsurface scattering in the cloth requires too much overhead. The wood varnish relies on baked reflections.
Texture atlasing is the first hurdle! I pack the apron, rails, and slate into a single UV layout at 2K. Then I bake the high-poly detail into maps:
- Normal maps for the wood grain relief
- Ambient occlusion for the corner pockets
- Curvature maps to protect edges from harsh speculars
Lighting shifts from global illumination to baked lightmaps. One directional light stays dynamic for the cue ball; the environment remains static. In Unreal, I use a reflection capture volume for the varnish sheen. At 0.8 roughness, the pool table 3d model’s felt reads under direct and ambient light. The result holds 60 frames per second.
Applications and Tips for Sharing Your 3D Billiard Table
Integrating the Model into Interior Design Mockups
A well crafted pool table 3d model can do more than sit on a hard drive. When you place it into a room layout, the model transforms a flat floor plan into a lived-in space. Clients can see how the table interacts with natural light, furniture traffic, and wall art.
For effective mockups, remember these points:
- Match the camera height to a standing person’s eye level for realistic proportions.
- Use a subtle depth of field to keep the focus on the table.
- Swap the surrounding textures with local South African materials like stone or oak.
This approach turns your render into a decision making tool, not just a visual garnish.
Exporting to Common Formats (FBX, OBJ, GLTF)
When your pool table 3d model is finished, exporting it correctly becomes the bridge to every client and studio. I rely on FBX for game engines, OBJ for broad software compatibility, and GLTF for browser based previews. Each format has a specific role, and mixing them up causes headaches.
- FBX preserves animation curves and object hierarchies.
- OBJ keeps clean geometry for CAD tools.
- GLTF optimizes for web and mobile viewers.
In South Africa, sharing a pool table 3d model via a GLTF link lets clients view it without installing heavy programs. Check your model scale and normal direction before exporting. A five minute test render prevents embarrassing dark faces later!
3D Printing a Scale Model of the Billiard Table
3D printing a scale model of the billiard table gives clients a tangible object they can hold and rotate. I start by checking wall thickness on the rails and legs, since thin geometry can collapse during printing. A resin printer captures the cloth texture better than FDM, but FDM works fine for prototyping!
When sharing the pool table 3d model digitally, the delivery method matters as much as the model itself. Here is what I keep in mind:
- Compress the file into a ZIP folder before sending it through email.
- Include a simple viewing instruction sheet for non technical clients.
- Add a ruler or reference object in the preview render to show scale.
Clients in South Africa appreciate quick feedback loops. A short video walkthrough of the model often prevents long email threads.
Selling or Distributing Your Model on Marketplaces
A pool table 3d model built for portfolio glory often fails at the point of sale. Marketplaces demand clean topology, sensible file sizes, and preview renders that show the table from every angle. I have watched talented artists upload stunning work only to bury it under a generic thumbnail. Presentation matters more than polygon count.
Selling the same model in South Africa adds a local twist. Buyers here request specific rail profiles and tournament cloth colours. I keep a version with standard pub dimensions ready. Screenshots get stolen frequently, so a subtle watermark on your preview render is non negotiable. Distribution becomes easier when you name your parts clearly. A buyer who can find the leg adjusters without hunting will remember your work.
Avoiding Common Mesh Cleanup and File Size Pitfalls
South African architects and game studios have different appetites for a pool table 3d model. One needs photoreal cloth and brass details for an interior walkthrough. The other needs low poly geometry that runs at 60 frames per second. Serving both from a single file creates tension. Mesh cleanup sits at the centre of that tension. I often receive models where mirrored halves leave overlapping vertices at the centreline. Those hidden duplications inflate the file size and confuse rigging tools!
Typical cleanup targets include:
- Overlapping vertices from mirror modifiers
- Interior faces hidden inside solid geometry
- Unapplied subdivision modifiers that multiply the polygon count
File size also suffers from careless texture packing. A single 8K varnish map can exceed the model geometry in megabytes. When data costs remain a daily concern in this country, that bloat is an insult to the buyer. The best pool table 3d model I have shared weighed less than the same asset with a sloppy export.

0 Comments