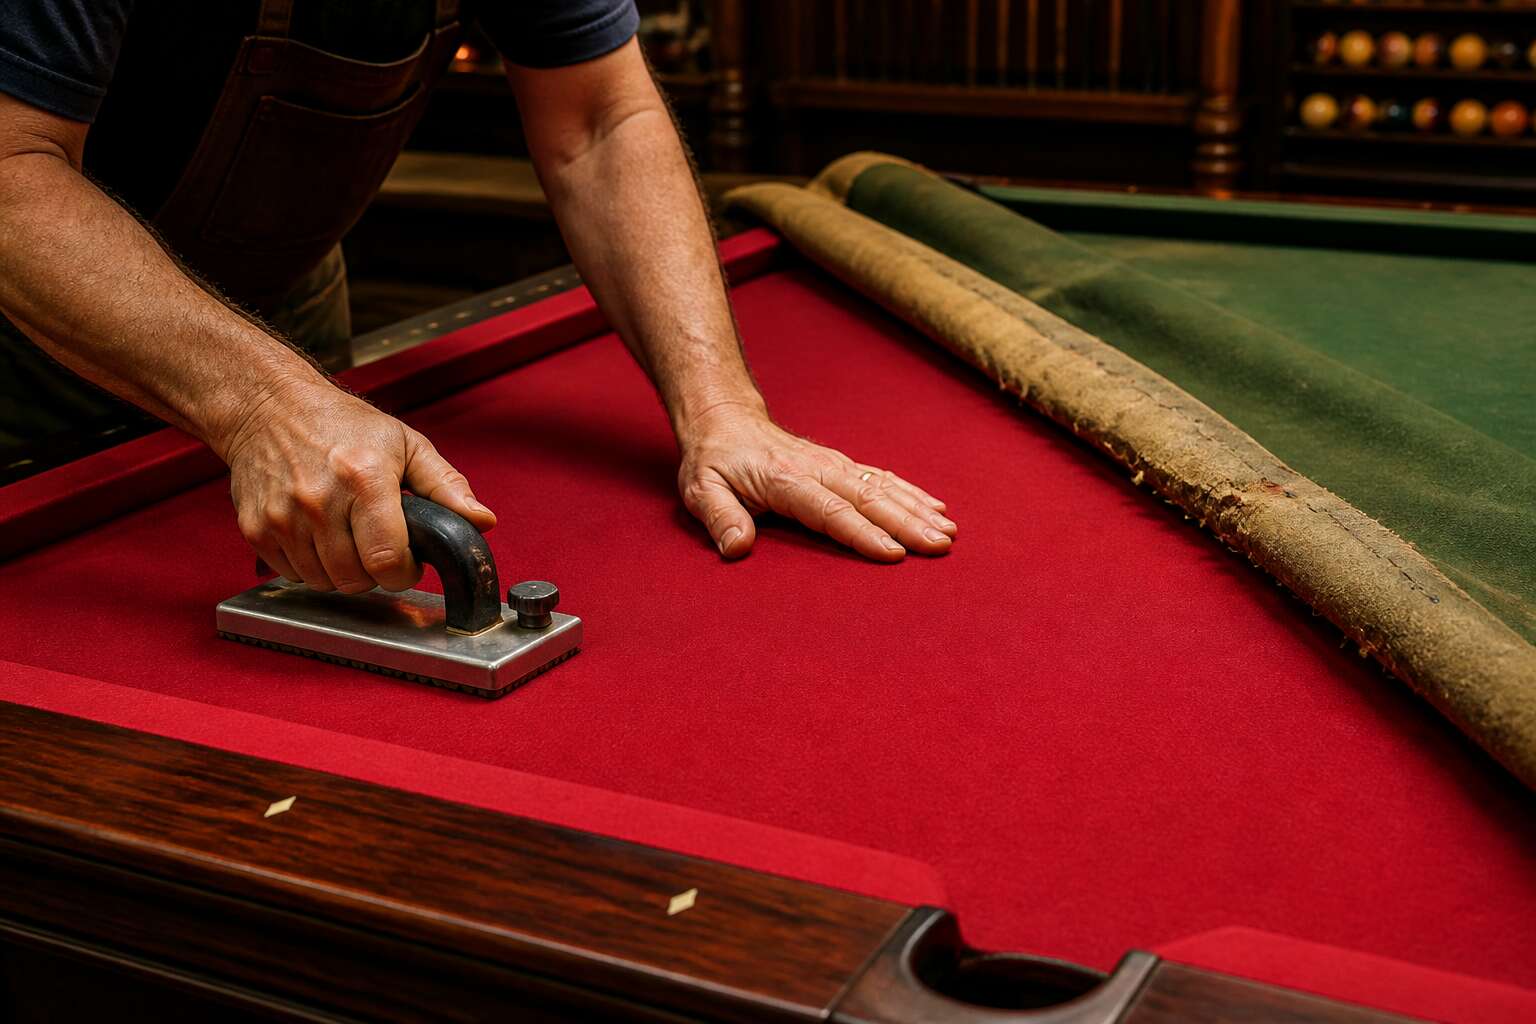
Evaluating the Current Cloth Condition
Common Warning Signs of Worn-Out Fabric
The first thing a pool table does when its cloth gives up is lie. It still looks acceptable under a lamp, but the balls roll as if they are being polite about a crack in the floor. Evaluating the current cloth condition starts with running your palm from the headstring to the foot. If the nap feels slick in one direction and rough in the other, that is normal. If it feels flat and shiny anywhere, that is wear.
The true warning signs are quieter. Here are common ones to spot before you call for pool table recovering:
– A persistent chalk dust film that refuses to brush off.
– Balls skipping or hopping on gentle shots.
– Visible bald patches near the pockets.
– A seam that has started to pucker or separate.
Each of these symptoms means the fabric has lost its woven grip, and no amount of vacuuming will restore it. When the cloth starts dictating how your game should be played, the fabric has already made its decision for you.
Typical Lifespan of Billiard Felt
Most billiard felt lasts three to eight years, but the actual number hinges on intensity of play and fabric quality. A home table used twice weekly will outlive a club table that sees nightly tournaments. The typical lifespan of billiard felt compresses dramatically under heavy use, sometimes to under two years.
Evaluating the current cloth condition goes beyond looking for obvious damage. Press into the cloth near the cushion nose. If it does not spring back quickly, the backing has broken down. Run a ball slowly along the rail and listen. A soft, thudding sound indicates the felt has lost its bounce.
- Compare the cloth sheen under direct light from different angles.
- Check for loose fibres around the pocket openings.
- Feel the cloth surface after brushing to test resilience.
When the playing surface no longer responds predictably, pool table recovering becomes the practical next step before further wear reaches the slate.
How Damaged Cloth Affects Cushion Response
Worn cloth rarely fails all at once. It erodes quietly along the cushion nose, where the ball makes its most violent contact. When the felt’s nap compresses unevenly, the rubber beneath cannot push back with its full voice. The rebound becomes soft, almost muffled, and the ball loses pace before it crosses the table. This changes how the cushion responds to spin and force.
A quick palm test near the rail will expose the problem. Feel for compacted fibres that have lost their spring.
- Compare the cloth’s texture along different rail sections.
- Roll a ball gently and note whether the return is crisp or dull.
If the cloth has flattened, it no longer transfers energy to the rubber. It acts as a dead layer. At that point, pool table recovering restores the intended interaction between ball, cloth, and cushion.
Checking the Underlying Slate for Issues
In my years working with pool tables across South Africa, I have seen cloth that looks flawless from a distance but fails the touch test completely. Elevating the table cloth reveals what the eye misses. Run your palm across the full playing surface. Listen for the sound of the fibres! A healthy cloth produces a specific whisper when brushed one way and a different one when brushed back. That difference tells you about the nap orientation and its remaining resilience.
The slate beneath deserves equal attention. Pool table recovering only succeeds when the foundation is sound. Check for these issues before committing to new cloth:
- Surface chips that create dead spots
- Cracks between slate sections that shift with humidity
- Uneven seams where balls deflect unexpectedly
A simple carpenter’s level across the width catches most problems. Any serious pool table recovering job starts with an honest assessment of both layers.
Essential Tools and Materials
Choosing the Right Felt Grade for Your Game
Felt grade is the quiet arbiter of every shot you will play. A 35 ounce cloth and a 24 ounce cloth behave like different games entirely. Choosing between wool blends and worsted cloth matters more than the label, as the right grade dictates spin, speed, and the honesty of the rebound.
Your toolkit determines how cleanly the old fabric lifts and how taut the new one stretches. The essentials are few but non-negotiable:
- A sharp utility knife for precise cuts around the cushions.
- A staple gun with stainless steel staples that resist rust.
- A chalk line to mark the centre of the slate.
- A felt stretcher to eliminate puckering under tension.
Pool table recovering in South Africa demands attention to humidity. Wool reacts to moisture, so allow the cloth to acclimatise in the room for a full day before fitting. For a professional pool table recovering result, that patience separates a lasting finish from a mediocre one.
Staple Guns, Tack Lifters, and Roller Tools
Every pool table recovering job begins with tool selection. The staple gun is your primary instrument, but not all are equal. A pneumatic model drives stainless steel staples with a consistency that hand tools cannot match. The tack lifter, meanwhile, pries away old cloth and stubborn staples without gouging the slate beneath. It is a small blade, yet it saves hours of frustration.
Roller tools deserve equal attention. They press the felt into the adhesive and smooth the cloth across the slate’s surface, removing air pockets before they become visible flaws. In South Africa’s humid climate, these tools also help manage the fabric’s natural expansion.
- Staple guns: pneumatic or heavy duty manual
- Tack lifters: curved blade for tight corners
- Roller tools: rubber or felt covered
Each tool earns its place in the kit for pool table recovering. Skimping on any of them compromises the final result.
Adhesives and Tape for Rail Linings
Choosing the right adhesive for rail linings is where pool table recovering often goes wrong. The bond between the rubber cushion and the cloth must hold under constant impact. A weak bond lets the fabric shift, and the cushion response becomes unpredictable.
Contact cement is my default for the curved nose. I brush a thin layer on both surfaces, wait for it to set, then press them together firmly. The tack creates an immediate grip that resists peeling. For the flat side sections, double-sided tape provides cleaner alignment and easier replacement later.
- Solvent based contact cement for the nose
- Water based contact cement for a lower odour option
- Double-sided tape for flat rail sections
South African humidity affects how these materials cure. Tape loses tack when moisture seeps in, so I apply extra strips near the pocket mouths. Pool table recovering demands this attention to detail, because the rails carry the most wear during play.
Measuring Tape and Chalk Line Techniques
Precision begins before the first pull of the staple gun. A cloth panel cut three millimetres short at a pocket will mock every careful stroke. Measuring tape and chalk line techniques in pool table recovering separate the artisan from the mere amateur.
Use a steel tape measure, never a fabric one. The latter stretches in humid coastal climates, which defeats the certainty you need. Lay the tape across the slate’s longest span and record the measurement twice. Snap a chalk line along the cloth’s centre to align the nap direction.
- Mark the geometric centre of each slate section.
- Snap chalk lines across width and length.
- Compare diagonal measurements to confirm the surface is square.
These marks guide every cut and keep the fabric taut where the ball travels fastest. Pool table recovering rewards those who confirm their numbers before committing.
Optional Upgrades: Cushion Rubber and Pocket Liners
A sharp utility knife and a rubber mallet belong in every recovering kit. Cushion rubber hides beneath the cloth, silently governing how the ball leaves the rail. Old rubber loses its resilience long before the felt shows wear. Replacing it while the slate sits exposed changes the table’s response in ways you can feel on the first break. Pocket liners, the quiet guardians of the cloth, prevent tears at the pocket mouths. Leather liners outlast the standard plastic variants by years.
For a complete job, gather these essentials:
- Cushion rubber strips cut precisely to each rail length
- Pocket liners sized for your table’s corner and side pockets
- A rubber mallet for seating the cushions without damaging the wood
- Spray adhesive for tacking the liner edges down
Pool table recovering presents a rare window to address these hidden components. The investment is modest compared to the consistency you gain on every shot.
Disassembly and Preparation Steps
Removing Rails, Pockets, and Hardware Safely
A typical slate table holds between 100 and 200 staples securing its cloth. The disassembly phase of pool table recovering demands patience. Every rail, pocket, and fastener must be removed without damaging the timber beneath. I always start with the pockets, easing out the staples with a tack lifter. Then the rails lift away, revealing the slate’s true condition.
A systematic approach prevents lost hardware. Consider this sequence:
1. Remove pocket liners and leather cups first.
2. Unbolt the rails using a socket wrench, keeping bolts labelled by position.
3. Lift rails straight upward to avoid twisting the cushion rubber.
4. Strip the old cloth from the slate, noting staple patterns.
Working around the table’s perimeter, I inspect each component for wear. Screws that resist turning receive a drop of penetrating oil. This careful preparation during pool table recovering ensures the new felt sits perfectly.
Extracting Old Staples and Adhesive Residue
After the rails and pockets are gone, the slate reveals its history. Bent staples and adhesive crust litter the surface. I work methodically, using a tack lifter to extract each staple at its original angle. The residue demands separate attention. A heat gun softens old glue without scorching the timber. My approach is straightforward:
- Scrape the bulk of rubber cement with a wide putty knife.
- Apply citrus solvent to stubborn patches and allow five minutes of dwell time.
- Wipe the area with a clean rag until the slate is completely smooth.
Every speck of old adhesive becomes a bump beneath the new felt. For pool table recovering, a pristine slate is non negotiable. I also run a magnet along the edges to catch broken staple fragments. This meticulous preparation ensures the fresh cloth adheres evenly. It is the quiet craft behind pool table recovering.
Cleaning the Slate Bed Before Cloth Installation
Every pool table recovering begins with a slate bed that has been stripped completely. After the final fragment of adhesive is gone, the stone still carries dust and oil. I sweep the entire surface with a soft brush, then pass a vacuum over every seam and corner. A lint free cloth dampened with denatured alcohol removes the last traces of human touch. I wait ten minutes for the alcohol to evaporate.
Then I run a straightedge across the bed to detect any raised spot. A single speck of dirt under the cloth will show through the playing surface. Preparation is a silent ritual. The slate must be dry. The slate must be cool. The slate must be bare. Only then can the new cloth honour the table.
Organizing Hardware for Effortless Reassembly
The disassembly phase is where most pool table recovering jobs go sideways. After removing every rail and dropping each pocket iron into a bucket, the table sits as a skeleton of slate and timber. This moment separates the impatient from the methodical. A single misplaced screw will cost you an hour later when the rail refuses to seat properly.
I sort every component as it comes off the table. Pocket liners, bolts, washers, and rail fasteners each have a natural home, and mixing them is an invitation to frustration. My system is simple: a muffin tray for small hardware, labeled bags for the longer screws, and a clear section of floor for the rails themselves.
– Set aside all bolts and screws into a segregated container.
– Group pocket liners by corner and side orientation.
– Keep rubber cushion pieces with their corresponding rail.
– Place hinges and brackets facing the same direction for quick identification.
The reassembly will test your memory. Once the fresh cloth stretches across the slate, every fastening point must align perfectly. I photograph the underside of each rail before removal. The shots capture screw angles, washer placements, and the natural seating of each component. A phone picture costs nothing, but it saves the painful trial and error of guessing which bolt belongs where.
Organize with intent, not habit. Work through the table in a clockwise sweep, labeling as you go. The dedication to order during disassembly makes the final stage of pool table recovering feel almost effortless.
A Step-by-Step Installation Walkthrough
Installing New Cloth on the Bed First
A competent pool table recovering job starts with the bed. Roll the new cloth across the cleaned slate, letting it overhang each side evenly. Snap a chalk line along the centre seam that runs from head to foot. This reference line tells you whether the cloth sits square.
Now work in a deliberate sequence. Smooth the fabric toward the rails with your roller tool, pushing air out ahead of the roller. Check the weave for straightness against the chalk line before you place any staples.
Use this order to secure the bed:
1. Staple the centre point at the head end.
2. Move to the foot end and pull the cloth taut before stapling.
3. Secure the centre of each long rail side.
4. Work outward from these eight anchor points in small increments.
Each staple should sit close to the slate edge, not in the cushion area. The bed cloth must stay smooth and uninterrupted because every bounce and roll depends on that surface.
Securing the Rails with Even Tension
With the bed cloth secured, the rails now demand equal care. Even tension across the rail cloth controls cushion rebound and ball response. Pull the fabric from the centre outward, never diagonally! I staple the middle of the long rail first, then stretch toward the ends in small steps.
A reliable order for the rail installation looks like this:
- Staple the centre point of the top rail.
- Move to the bottom rail and pull taut.
- Staple the centre of each end rail.
- Alternate outward, keeping the weave straight.
Check each staple sits in the groove, away from the cushion nose. A slight fold here becomes a visible ripple after reassembly. A successful pool table recovering depends on this careful sequence, not on raw force.
Stapling Techniques That Prevent Wrinkles
A single staple out of line can turn a smooth surface into a rippled mess. I learned this the hard way during my first pool table recovering job. The fix is methodical placement. Start by pressing the cloth against the rail groove with your palm, then drive the staple at a shallow angle. Work from the centre outward, never from the edges inward. Here is the order I trust:
- Staple the exact midpoint of the rail.
- Pull the fabric taut toward one end, keeping the weave parallel to the cushion.
- Place the next staple roughly 2 cm from the centre.
- Repeat on the opposite side, alternating left and right.
Check each staple sits deep in the groove, away from the cushion nose. If you see a fold, remove that staple and stretch again. Even tension beats raw force every time. Successful pool table recovering flows from this patient rhythm, so resist the urge to hurry!
Trimming Excess Fabric Around Corners
The corners are where most pool table recovering jobs reveal their true quality. After the rails are stapled, you will face excess fabric bunching at each corner. This is the moment to slow down!
Trim with a sharp blade, never scissors. Cut from the outer edge toward the cushion, leaving a small triangle of cloth that folds underneath. The goal is a clean wrap that follows the rail’s contour. Careful trimming makes the entire pool table recovering process look seamless.
Here is the sequence I use:
- Cut the main excess away, leaving about 2 cm of allowance.
- Make a relief cut at the exact corner point, stopping just short of the staple line.
- Fold the fabric over the rail end and staple it flush.
- Check the pocket opening for any loose threads.
A tidy corner means the cloth sits flat against the cushion, and the ball travels true. That is what you are aiming for.
Reinstalling Cushions, Rails, and Pockets
The click of a rail seating flush against the slate is the quiet payoff of a proper pool table recovering job. I check the cushion rubber before bolting anything down. A brittle strip cancels all the work you put into the new cloth.
The bolt sequence determines how the corners meet. Follow this order:
- Seat the head rail first, tightening each bolt a quarter turn at a time.
- Ease the side rails toward the head rail, keeping the slate level.
- Lock the foot rail last to close the frame.
Pockets always connect last. The leather straps slide into the rail slot before the final torque, never after. Loose straps create dead rebounds, and sharp liners catch the ball edge. Both ruin the table.
Final Inspection and Tension Adjustments
Once the rails are seated, the final stage of a pool table recovering project starts. Walk the length of the cloth with your palm flat. Any ripple or looseness near the cushion nose means the tension is off. The cloth should feel firm, yet allow a slight give at the pocket mouths.
Final inspection is a series of small corrections. Check each bolt torque, then run a ball along every rail. Listen for hollow sounds. Adjust the cloth tension screw by screw, easing only the sections that sag.
Here is the order I follow during the walkthrough:
- Run the ball from corner to corner on each rail.
- Lift the cloth at the slate edge to verify grip.
- Re-torque the rail bolts after the cloth settles.
This last pass separates a rushed pool table recovering from a table that plays true. It takes twenty minutes, and it matters.
Protecting Your Investment After Installation
Daily and Weekly Care Routines
Once the last staple is seated, the true work begins. Protecting your investment means respecting the cloth’s surface every day. I’ve found that a soft bristle brush, used each morning, lifts dust and chalk before they settle into the weave. For weekly care, avoid harsh chemicals and never use a damp cloth, as moisture can warp the slate and loosen the adhesive beneath the rails.
- Brush the playing surface in one direction.
- Wipe the rails with a dry microfiber cloth.
- Clear chalk residue around the pockets.
Weekly attention involves inspecting the cloth for snags and ensuring the cushions retain their rebound. These habits extend the life of your pool table recovering, preserving its playability for years. Small maintenance steps prevent the need for premature refurbishment, so treat the felt like the delicate surface it truly is.
Proper Brushing and Vacuuming Methods
Most players brush their table incorrectly, pressing too hard and flattening the weave. The cloth on a freshly recovered table needs a lighter touch. I use a horsehair brush with firm but gentle strokes, always moving from the head rail toward the foot rail. That simple direction matters more than most realise!
Vacuuming requires even more care. A standard vacuum head can snag the cloth and pull staples loose. Use a brush attachment and keep the nozzle slightly elevated. This is where many pool table recovering jobs get ruined within months.
– Never slide the vacuum across the surface; lift and place it.
– Work in straight lines, overlapping each pass.
– Check the dust bag frequently, as chalk residue can clog the motor.
Keep the weave open and the nap consistent. Your cloth will stay true.
Avoiding Common Sources of Fabric Damage
A single rogue beer bottle cap can undo a whole afternoon of pool table recovering. Once new cloth is stretched, the work shifts to defending it from everyday household hazards. Oily fingers, sliding cue shafts, and that one friend who taps ash over the rail all contribute to premature wear.
The most insidious damage comes from moisture. A condensation ring from a glass left near a pocket wicks into the weave, causing discoloration and stiffness. Sunlight from a west-facing window fades the fabric unevenly, leaving permanent patches of faded color.
- Drinks set on the rails or bed, leaving rings.
- Pets stepping or clawing at the cloth.
- Cues leaned against the table surface.
These sources, everyday and overlooked, cut short the cloth’s lifespan. Vigilance costs far less than a redo.
When to Call a Professional for Repairs
Pool table recovering transforms a tired slate into a responsive playing field, but the new cloth demands patience before it reaches full character. The weave must relax into its tension over several sessions. I have watched players undo careful work by leaning on the bed during the first week.
Professional repairs enter the picture when the fabric fails despite proper care:
- Rippling along the cushion line that resists smoothing
- Staples that creep upward from the rail face
- A corner pocket that refuses to hold its cloth seat
These conditions worsen with play and pull the cloth further off its anchor points.
Call a specialist for pool table recovering when the slate itself feels suspect, such as a soft bounce near a seam or an audible rattle beneath the cloth. These symptoms require pulling the fabric, inspecting the base, and redoing the stretch work. That is a job for trained hands, not weekend tools.

0 Comments